If you develop with Node.js, you’ve probably encountered this problem: one project requires the version 16, another requires version 18, and that legacy one still runs on 14. Now what? Manually reinstall Node.js every time you switch projects? Fortunately, no! In this article we’ll talk about NVM (Node Version Manager), the simple and powerful solution for managing muntiple Node.js versions in the same environment.
The Classic Challenges with Node.js
1. Compatibility
Each project may depend on a different version of Node.js. As the ecosystem evolves, libraries and frameworks also update their requirements.
2. Switching Projects
If you work on multiple projects simultaneously, you know the pain to having to manually reinstall Node.js with each switch.
3. Time Loss
This back-and-forth of installations consumes precious time, besides being prone to errors.
The Solution: NVM (Node Version Manager)
The NVM solve all these problems. With it, you can:
- Install multiple versions of Node.js side by side.
- Switch between versions with a simple command.
- Ensure that each project uses the exact version it need.
- Configure the project version via file
.nvmrc.
NVM is widely used on Unix systems (Linux, MacOS), but there’s also a version for Windows!
Installing NVM
1. Uninstall the current Node.js (to avoid conflicts)
Before installing NVM, it’s recommended to remove the manually installed Node.js.
2. Installation on Linux and MacOS
Run in the terminal:
curl -o- https://raw.githubusercontent.com/nvm-sh/nvm/v0.39.7/install.sh | bashor
wget -qO- https://raw.githubusercontent.com/nvm-sh/nvm/v0.39.7/install.sh | bashThe script will:
- Clone the repository to ~/.nvm.
- Add the settings to your profile file (.bash_profile, .zshrc, etc).
Restart the terminal after installation
3. Installation on Windows
nvm-windows is an adaptation for Windows:
- Go to: https://github.com/coreybutler/nvm-windows/releases
- Download and run the installer.
- Follow the simple interface instructions.
Tip: If you use WSL (Windows Subsystem for Linux), you can install the original NVM inside WSL and work as in a Linux environment.
Essential NVM Commands
Now that NVM is installed, let’s get to the point:
Check installed versions:
nvm lsCheck available versions:
nvm list availableInstall a new version:
nvm install 18.16.0Install the latest version:
nvm install latestInstall the latest LTS version:
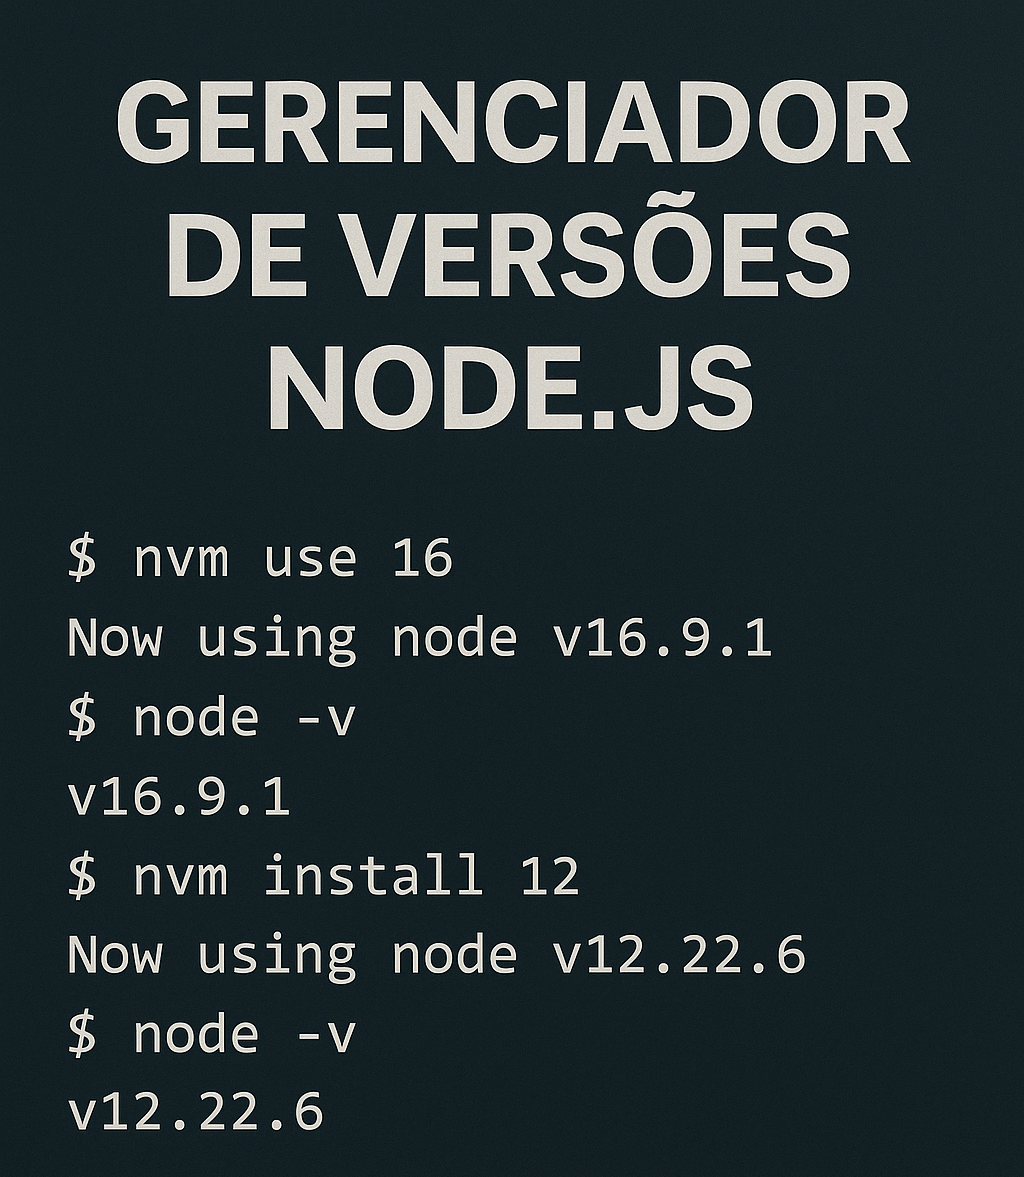
nvm install ltsSwitch version:
nvm use 16.20.0Check current version:
nvm currentUninstall a version:
nvm uninstall 14.19.1Keeping global packages between versions:
Whenever you install a new version, NPM resets clean. But you can migrate global packages:
nvm install 18.16.0 --reinstall-packages-from=16Defining a project version (.nvmrc)
To ensure each project uses the correct version, create a .nvmrc file at the project root:
echo "18.16.0" > .nvmrcNow, whenever you enter the project folder, use:
nvm useNVM reads the .nvmrc file and automatically activates the defined version.
Practical Tips
- Add the
nvm usecommand to your startup terminal (e.g.,.bashrc) to automate version detection when changing directories. - Combine with
direnvfor a 100% automatic experience. - Use
.nvmrcto ensure the whole team uses the same version.
What if I want something more advanced?
For cases where projects require different versions of NPM or system dependencies, it’s worth knowing tools like:
- Volta (more automatic, supports Windows and Mac/Linux)
- asdf (manages several runtime tools beyond Node.js)
Conclusion
NVM is an indispensable tool for any Node.js developer. It eliminates the headache of managing versions, increases productivity and ensures consistency in development environments.
Adopting NVM in your daily routine is a simple step, but with a great impact on the workflow.
If you don’t use it yet, give it a try! And if you already do, share these tips with the team!